
Imagine walking up to your front door and—with no fumbling for keys—opening it simply with a tap on your phone, a fingerprint, or a secret PIN. That’s the magic of a smart lock. But before you enjoy that convenience, there’s one question: How do you actually install it?
In this guide, we’ll walk you through everything you need to know step-by-step to install a smart lock on your door. From gathering tools to testing the final setup, we’ll cover it all in plain language.
By the end, you’ll be ready to turn your front door into a connected, smart lock installation success story – and maybe even impress your neighbours along the way.
Why a Smart Lock, Anyway?
First, let me convince you why investing in a smart lock is more than just a gadget whim.
- Keyless convenience: No more worrying where you left your key, or hiding a spare under the mat.
- Remote access & monitoring: You can lock or unlock the door from anywhere, and check logs of who entered and when.
- Guest access: Grant temporary PIN codes to guests or service people, and revoke them at any time.
- Smart home integration: Your lock can talk to your lights, cameras, and thermostat—part of a unified ecosystem.
If you’re sold already (I hope you are!), let’s roll up our sleeves and get hands-on.
Before You Start: Preparation Is Everything
You can’t just throw a smart lock at any door and hope it works. A little groundwork prevents big frustration.
1. Check Door Compatibility
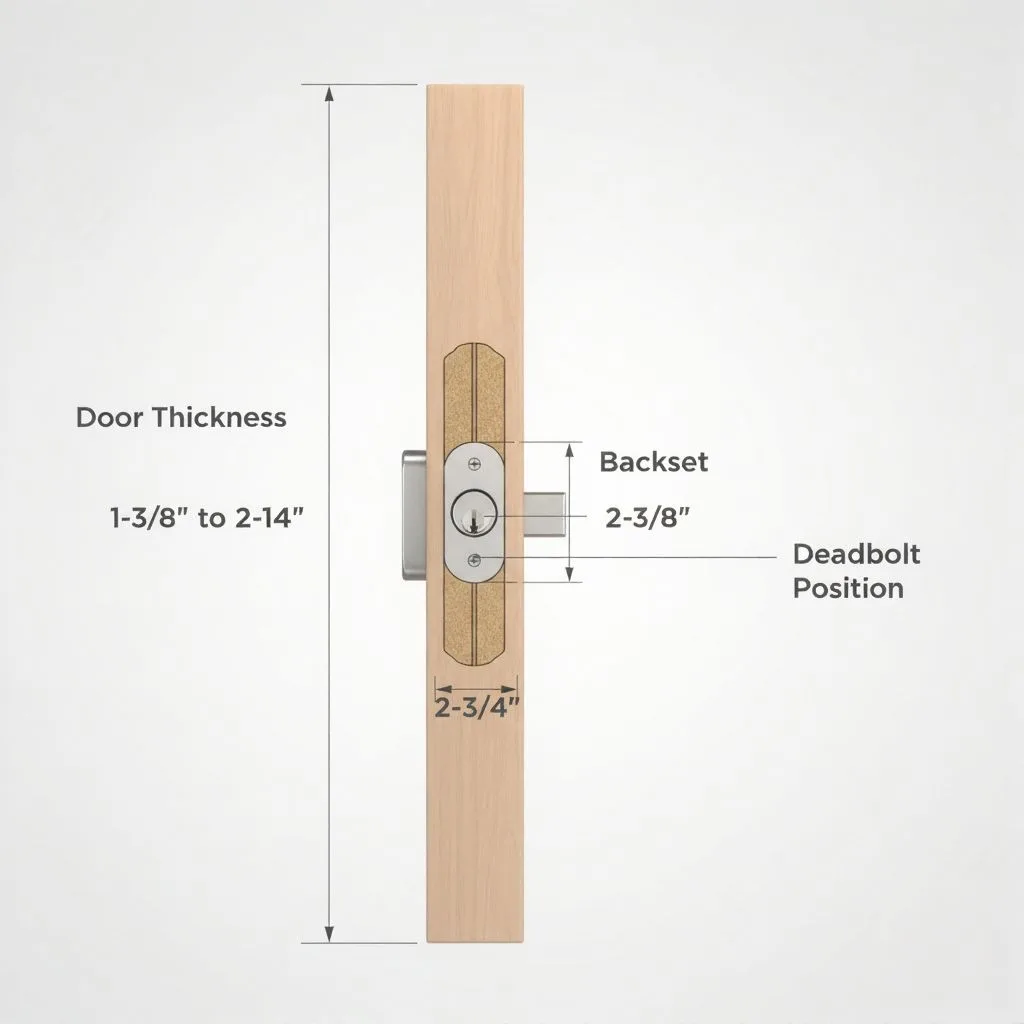
- Door thickness: Most smart locks ship to work with standard doors (about 35–50 mm thick). If your door is ultra-thin or extra-thick, you may need extension kits.
- Backset distance: This is the distance from the door edge (where the latch is) to the centre of the lock borehole—commonly 60 mm or 70 mm. Match that.
- Existing lock type: If your door uses a single cylinder deadbolt (thumb turn inside, key slot outside), that makes things easier. Some smart lock systems are retrofit units that use your existing deadbolt internally.
- Door material & frame: Wood, metal, or fibreglass doors respond differently to drilling. Check whether the frame is solid enough to resist force.
- Power & connectivity: Some smart locks use batteries, some hardwire, some require a Wi-Fi bridge. Know your power source and signal strength near the door.
If your door doesn’t match these basics, you might need upgrades or a different model before you begin.
2. Gather Tools & Parts
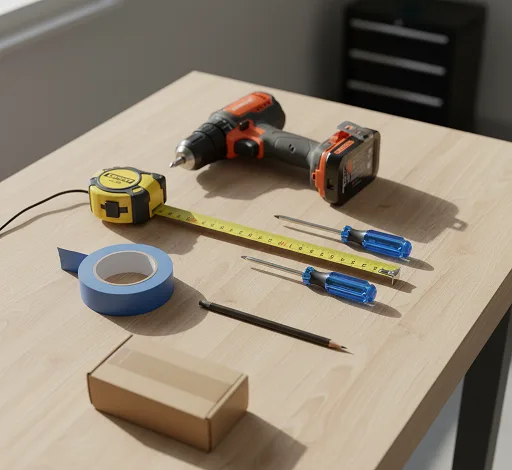
You’ll need:
- The smart lock kit itself (check everything is included).
- Screwdrivers (Phillips, flat).
- Drill (optional, for holes or enlargement).
- Chisel (for strike plate adjustments).
- Tape (masking or painter’s) to mark.
- Pencil or marker.
- Ruler/measuring tape.
- Spare batteries (if the lock is battery-powered).
Don’t wait until you’re half in to realize you lack a screwdriver!
Step-by-Step Installation Guide
Let’s get to it. Below is a generalized sequence that applies to many popular smart locks. Always refer to your manufacturer’s manual, but this blueprint helps you understand what you’re doing.
Step 1: Remove Existing Lock Components
- From the inside face, unscrew and remove the thumb turn or interior part of your deadbolt.
- Remove the exterior key cylinder (if it’s separate) by unscrewing the through-bolts.
- Pull out the deadbolt from the edge of the door.
You’ve now stripped the door down to its core. The old hardware is out, and you have a blank slate.
Step 2: Prepare the Door Edge & Strike Plate
- Slide the new deadbolt (if included) into the door edge. Adjust its position so it’s centred and aligned with the other hardware.
- If your new lock comes with a different faceplate or latch shape, you may need to chisel the recess in the door edge for a flush fit.
- On the door frame side, ensure the strike plate is aligned. You may need to reposition or enlarge the mortise (indent) in the frame so the bolt can smoothly engage.
Step 3: Mount the Exterior (Outside) Assembly
- Place the exterior part (keypad, fingerprint pad, or key slot) through the door.
- Route any tethered cables through the provided hole (if a hard-wired model).
- Make sure it sits flush, level, and doesn’t wiggle.
Step 4: Mount the Interior (Inside) Assembly
- On the inside, attach the matching mounting plate (adapter) over the cables or shaft.
- Tighten the through-bolts that connect the inside and outside assemblies—but not fully tight yet.
- If there’s wiring, plug in connectors carefully (watch for alignment marks).
This is the moment where a misalignment bites you: if the interior and exterior aren’t perfectly in sync, the lock may jam.
Step 5: Insert Batteries / Power It Up
- Insert fresh batteries (usually AA or AAA, or dedicated packs). Make sure the positive/negative orientation is correct.
- If the model uses hard-wiring, connect to the low-voltage power (if you have that setup).
Once powered, many smart locks perform a calibration or initialization sequence—the bolt will automatically test its travel. Let it complete.
Step 6: Final Tightening and Alignment
- After calibration, gently tighten all screws completely.
- Check that the bolt slides forward and backward smoothly into the strike plate.
- If something feels stiff, loosen slightly and realign.
It’s worth being a bit fussy here: once the lock is tightened, misalignment can cause strain, early wear, or failure to lock properly.
Step 7: App Setup & Configuration
- Download the lock’s mobile app (iOS / Android) and create an account (if required).
- Add the lock in the app, pair via Bluetooth or Wi-Fi or the vendor’s hub.
- Name your lock (e.g. “Front Door”, “Back Gate”).
- Set up admin codes, guest codes, schedules, and access.
- If integrated with your home’s automation (Alexa, Google Home, SmartThings, etc.), connect the lock there too.
Step 8: Test All Modes of Entry
Before considering the job done, test:
- Manual: Use the physical key or thumb turn.
- App / Remote: Lock/unlock from the app.
- PIN / Biometric: If your lock has a keypad or fingerprint, try it.
- Auto-lock: If your lock auto-locks, wait for it to activate.
- Failsafe/emergency: Some locks have a backup power input (USB) or emergency override mode—verify those work.
Only when every method works smoothly should you call it a day.
Real-World Tips
- Label wires when you loosen anything. It’s so easy to confuse connectors and end up troubleshooting a wiring mix-up later.
- Don’t over-tighten screws. Aluminium housings strip easily.
- Use long screws in the strike plate—one of the best reinforcements against forced entry is putting a 60 mm screw that reaches the wall stud inside the sill, not just in wood trim.
- Clean the bolt path of dust or wood chips; any debris can cause friction.
- Stand outside and see alignment—look down the bolt direction. If it’s angled, adjust accordingly.
- Keep spare batteries. Even the best locks warn, but you don’t want them to die when you’re away.
- Firmware updates matter. Check for lock firmware updates in the app; these often patch bugs or security issues.
- Backup access: If your model doesn’t have a keyed override, consider installing one or ensuring emergency access.
- Temperature & weather: In hot or cold climates, lubricate with the recommended product (silicone, not oil) to prevent jamming.
One user on a smart home forum lamented:
“Your lock is of the incompatible ‘Integrated’ variety … you’ll need to purchase a new lever handle … spend hours filling holes, drilling new ones.” Reddit
That’s a cautionary tale—don’t assume every lock fits every door. Compatibility is king.
Common Challenges & How to Overcome Them
| Problem | Likely Cause | Fix / Tip |
|---|---|---|
| Bolt won’t fully retract or extend | Misalignment or binding | Loosen bolts and realign the interior & exterior assemblies |
| Strike plate hole is too small | Bad battery or loose wires | Replace battery, check wiring connectors |
| Wi-Fi / Connectivity fails | Too far, weak signal | Use a bridge/extender |
| Jamming in hot/cold weather | Thermal expansion or contraction | Lubricate and give a small clearance |
| Door frame strike misfit | Strike plate hole too small | Electric section is not powering |
Those are the hurdles I’ve stumbled upon—and with patience and persistence, you can overcome them.
FAQs
Q: Can I install a smart lock myself, or should I hire a professional?
Yes, many DIYers can do it with patience and the right tools. Most smart locks are designed for retrofit installation. However, if your door is non-standard (exotic thickness, mortise style, metal frame), or you’re not confident working with power or wiring, hiring a locksmith or technician is wise.
Q: How long does it take to install a smart lock?
If everything goes smoothly, a standard retrofit install can take 30 to 60 minutes. But if you encounter alignment issues, door frame modifications, or wiring problems, it may take several hours.
Q: What happens if the battery dies?
Most locks include a low-battery warning well before failure. Many models also offer emergency power via a micro USB port or 9V connection near the keypad. Some also retain mechanical key override or external keypad fallback.
Q: Will a smart lock work if my Wi-Fi goes down?
Usually yes—most operations (locking/unlocking using keypad, biometric, or thumb turn) work locally, even without internet. Just remote features (app control from outside) will fail until connectivity is restored.
Q: Are smart locks secure? Could they be hacked?
Security varies by manufacturer and encryption. Reputable locks use strong encryption, two-factor authentication, and firmware updates. Use strong admin passwords, enable alerts, and change default PINs. As with any IoT device, proper configuration is key.
Q: Can I integrate the smart lock with other smart home systems?
Yes. Many locks support integration with Alexa, Google Home, Apple HomeKit, or protocols like Zigbee or Z-Wave. Be sure the lock you choose has the ecosystem compatibility you need.
Conclusion
You’ve just journeyed from blank door to digital door, learning not only the “how” but the “why” behind each screw, alignment, and calibration moment. The path isn’t always smooth—expect some wrinkling of frustration, but also the thrill when your lock obeys your first command from your phone.
Once installed, the satisfaction of walking up and letting your lock just work is unbeatable. More than convenience, it’s a gateway to a more secure, integrated, smart home.
If your door checks out and you’ve picked the right model, you absolutely can do this yourself. Yet, if you hit a wall—physical mismatch, wiring complexity, or fear of voiding warranty—don’t hesitate to bring in a pro for the last mile.
Now, one last thing: choose that smart lock (be sure it matches your door specs), follow this guide, and take your home security into the 21st century. And when you’re ready, click “Buy”, install confidently—and enjoy unlocking the future.