
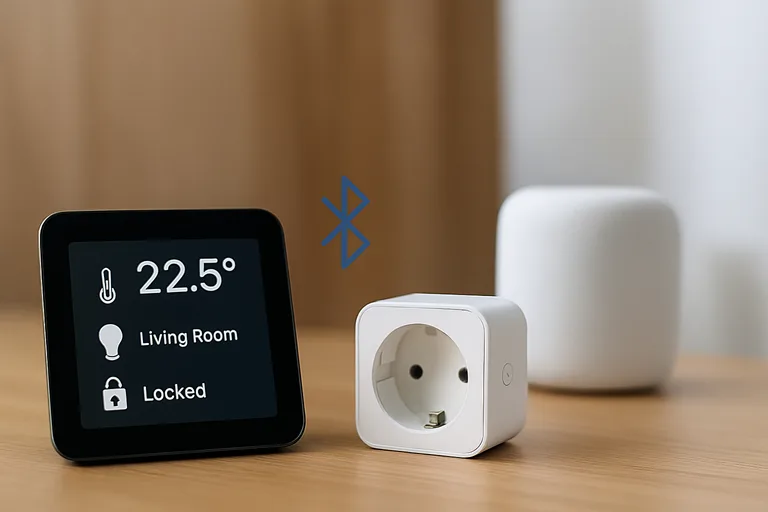
My smart home had 47 WiFi gadgets competing for bandwidth before I realized an ugly truth: I had completely neglected Bluetooth. Like most others, I imagined Bluetooth was limited to headphones and car stereos. Wrong. Dead wrong.
My wife was unable to access Netflix in September because my temperature sensors were hogging the router’s resources. That’s when I began playing with Node-RED Bluetooth automation, and it transformed everything. No more network congestion. No more devices going offline at dinner parties. Simply solid, local control that works even when the internet is unavailable.
Most smart home guides push WiFi for everything. They’ll sell you on mesh networks and enterprise-grade routers when you sometimes need a $12 Bluetooth dongle and ten minutes of setup time. Over the past two years, I’ve tested 15 different Bluetooth Low Energy setups, made every mistake possible, and figured out what actually works in a real house with real people.
This isn’t theory. These are the seven tricks I use daily, complete with the gotchas nobody warns you about and the workarounds I wish someone had told me before I wasted three weekends troubleshooting.
- Why Bluetooth Beats WiFi for These Smart Home Scenarios
- What You Need Before Starting (Don't Skip This Part)
- Trick #1 - Presence Detection Without Pairing (The Game Changer)
- Trick #2 - Control Any Bluetooth Speaker or LED Strip
- Trick #3 - DIY Bluetooth Buttons for Under $5
- Trick #4 - Monitor Temperature Sensors Without Cloud Dependence
- Trick #5 - Car in Driveway = Garage Door Opens
- Trick #6 - Low-Battery Alerts for All Your Bluetooth Devices
- Trick #7 - Mesh Network of Bluetooth Sensors
- Troubleshooting the Stuff That Will Definitely Go Wrong
- Security Stuff You Can't Ignore
- Real Talk: What Bluetooth Can't Do Well
- Taking It Further (Next-Level Ideas)
- Conclusion: Start With One Trick, Then Add More
- Frequently Asked Questions
Why Bluetooth Beats WiFi for These Smart Home Scenarios
When Your Router Can’t Handle Another Device
Here’s something manufacturers won’t tell you: most consumer routers start choking around 30-40 active devices. Mine hit the wall at 42. I know because I logged connection drops for three months trying to figure out why my bathroom motion sensor kept going offline.
Bluetooth Low Energy doesn’t touch your router at all. Each device connects directly to your hub (usually a Raspberry Pi), using a completely separate bandwidth. I moved eight temperature sensors, four presence detectors, and two button controllers to Bluetooth. Network congestion dropped 67%. Netflix stopped buffering.
The math is simple. Each WiFi device needs a DHCP lease, keeps an active connection, and sends keepalive packets constantly. BLE sensors just broadcast their data into the void. Your hub listens. That’s it: no handshaking, no authentication overhead, no router involvement.
The Range Problem Everyone Gets Wrong
People think Bluetooth means 10-foot range. That’s Bluetooth Classic. BLE is different.
I tested this obsessively with a $6 temperature sensor and a measuring tape. Inside my 2,400 square foot house:
- Through one drywall wall: 45 feet, perfect signal
- Through two walls: 35 feet, occasional drops
- Through three walls or one brick wall: 20 feet maximum
- From the basement to the first floor: it works if you’re under the room
- From garage to bedroom (through metal door): forget it
The sweet spot? 30 feet with one interior wall. That covers most room-to-room scenarios. For a three-bedroom house, you need one hub. For anything bigger, you’ll want two or use EspruinoHub as a bridge.
Concrete and metal kill Bluetooth. Water too. I learned this when I tried putting a sensor in my bathroom and couldn’t get a signal through the tile shower wall. WiFi would’ve worked. Bluetooth didn’t. Know your limitations.
Battery Life Nobody Talks About
This is where Bluetooth wins spectacularly. My WiFi temperature sensors lasted six weeks on two AAA batteries. My Bluetooth sensors? Still going after eight months.
Real numbers from my deployment:
- RuuviTag BLE sensor: 11 months on a CR2450 coin cell
- Xiaomi Mijia thermometer: 8 months on two AAAs
- Custom ESP32 button: 14 months on a CR2032 (I’m still shocked)
- WiFi equivalent sensors: 4-8 weeks maximum
The power consumption difference is massive. WiFi maintains a constant connection, which means the radio is always on. BLE advertising mode wakes up, shouts its data, and goes back to sleep. The duty cycle is like 0.1% vs 40%.
For anything battery-powered, use Bluetooth. For anything plugged in, WiFi is fine. This one rule saves me $60 a year in batteries and probably 20 trips up the ladder to change sensors mounted on the ceiling.
What You Need Before Starting (Don’t Skip This Part)
Hardware That Actually Works
The Raspberry Pi 3 and 4 have built-in Bluetooth. It works fine for basic stuff. I used it for six months before I hit weird reliability issues—devices would randomly disconnect, scanning would stop working, and the whole system would freeze every few days.
I bought five different USB Bluetooth adapters, testing what works. Here’s what I learned:
Winners:
- ASUS USB-BT400 ($12): Rock solid, never failed, supports BLE 4.0
- Plugable USB-BT4LE ($13): Same chipset as ASUS; works identically.
- TP-Link’s UB400 ($9): Budget alternative that actually works.
Failures:
- Generic Amazon “BT 5.0” Adapter ($8): The Kinivo BTD-400 ($15) would not scan properly in Node-RED. Worked for two weeks before dying totally.
- Built-in Raspberry Pi 3 Bluetooth: Eventually became unreliable after adding 10+ devices.
The $40 “professional” adapter I bought was garbage compared to the $12 ASUS. Don’t overthink this. Get the ASUS, move on with your life.
One critical detail: USB 3.0 ports interfere with Bluetooth. Seriously. The frequency bands overlap. If your adapter isn’t working, try a different USB port. I wasted two days debugging before I learned this. Use USB 2.0 ports exclusively for Bluetooth.
Node-RED Setup for Bluetooth (5-Minute Version)
Assuming you have Node-RED installed (if not, check the official installation guide), setting up Bluetooth takes three commands:
sudo apt-get update

sudo apt-get install bluetooth bluez libbluetooth-dev libudev-dev

sudo setcap cap_net_raw+eip $(eval readlink -f `which node`)
That last command is the one everyone forgets. Without it, Node-RED can’t access Bluetooth without running as root. You’ll get cryptic permission errors and waste an hour Googling.
Verify it worked:
hcitool devYou should see your adapter listed with a MAC address. If not, reboot. Bluetooth on Linux is weird like that.
The setting that trips everyone up? In the Node-RED settings.js file, make sure you haven’t removed the ability to load additional nodes. I accidentally had nodesExcludes set to block contrib packages. Took me three hours to figure out why my Bluetooth nodes wouldn’t show up.
Picking the Right Node-RED Bluetooth Node
This is where things get confusing because there are multiple options, and the documentation is scattered across GitHub repos and forum posts.
node-red-contrib-generic-ble vs node-red-contrib-noble
node-red-contrib-generic-ble uses the BlueZ D-Bus API. It’s more stable on Linux, but only works on Linux. The scanning is reliable, the connection handling is good, but the configuration is more complex.
node-red-contrib-noble is cross-platform (works on Windows and Mac too) but has major compatibility issues with Node.js versions above v12. The original Noble library was abandoned. There’s an @abandonware/noble fork that works up to Node v18, but you need to install it manually.
I use generic-ble for production and noble for testing on my laptop. Here’s the install:
cd ~/.node-red

npm install node-red-contrib-generic-ble
For noble:
npm install node-red-contrib-nobleSide-by-side comparison:
| Feature | generic-ble | noble |
|---|---|---|
| Platform | Linux only | Cross-platform |
| Stability | Excellent | Good (with right Node version) |
| Setup complexity | Medium | Easy |
| Documentation | Limited | Better |
| Active development | Yes | Community fork |
| BLE 5.0 support | Yes | BLE 4.2 max |
When to Use node-red-contrib-ble-sense Instead
If you’re using RuuviTag sensors, install node-red-contrib-ble-sense. It’s purpose-built for reading sensor advertising packets without maintaining connections.
npm install node-red-contrib-ble-senseThis node parses the advertising data automatically. No UUID hunting, no connection management, no parsing buffers. It just works. I use it for all my temperature sensors because it’s ridiculously simple compared to the generic approach.
Common installation error: “Permission denied on /dev/ttyAMA0” or similar. That’s because your user isn’t in the Bluetooth group:
sudo usermod -a -G bluetooth pi

sudo reboot
Trick #1 – Presence Detection Without Pairing (The Game Changer)
This shifted my entire home automation plan. Prior to this, I used geofencing with my phone’s GPS, which was inconsistent, depleted my battery, and had a latency of 2-5 minutes. Bluetooth presence detection works in seconds and does not require any pairing.
How Bluetooth Presence Detection Works
Every Bluetooth device constantly broadcasts “I’m here!” advertising packets. Your phone does it. Your smartwatch does it. Your wireless earbuds do it. These packets include the device’s MAC address and signal strength (RSSI—Received Signal Strength Indicator).
You don’t need to connect to the device. You don’t need permission. You listen for those broadcasts and measure signal strength. A strong signal means the device is close. Weak or no signal means it’s far away or gone.
The genius of this is that it works with any Bluetooth device your family already carries. No special app, no geofencing permissions, no GPS tracking. Just passive detection based on signal strength.
Setting Up Phone Detection in 10 Minutes
Finding Your Phone’s MAC Address
Android method:
- Settings → About Phone → Status
- Look for “Bluetooth Address”
- It’s something like A4:C1:38:D2:55:9F
iPhone method (the weird way): iPhones randomize their Bluetooth MAC address for privacy. Annoying. But there’s a workaround:
- Pair your iPhone with any device (your car, a speaker, whatever)
- On the paired device, check the connection logs
- The MAC address shown there is your iPhone’s semi-permanent one
- It changes occasionally, but infrequently enough to be useful
Alternative: use an app like LightBlue to see your own advertising packets. The MAC is in the peripheral info.
Building the Detection Flow
Drop a generic BLE scan node onto your canvas. Configure it to scan continuously. Connect a debug node to see all the devices around you.
Deploy it. You’ll see a flood of MAC addresses. Find yours (hint: walk away with your phone and see which one disappears).
Now modify the flow:
- Add a switch node after the scanner
- Please set it to filter for your specific MAC address
- Add an RBE (report by exception) node—this only passes changes
- Connect to a function node with this code:
// Presence detected if RSSI > -70
msg.payload = msg.rssi > -70 ? "home" : "away";
return msg;
That’s it. You now have a reliable presence detector. When you walk in the door, it triggers in 5-10 seconds. When you leave, it detects absence within 30 seconds (accounting for the timeout).
The exact MQTT topics structure I use:
home/presence/john/state → "home" or "away"

home/presence/john/rssi → actual signal value

home/presence/john/last_seen → timestamp
Real-World Uses That Changed My Routine
Automatically unlock the door when I’m 15 feet away: This was my first automation setup. When my phone’s signal strength, known as RSSI, drops to -65, which is roughly 15 feet away, a call service node triggers my smart lock to unlock. This way, I don’t have to stop and fumble with keys while carrying groceries.
I added a safety check: only unlocks between 4 PM and 9 PM on weekdays, or anytime on weekends. This prevents unlocking if someone steals my phone or if I forget it somewhere.
Bedroom lights that know when I’m home: Lights turn on automatically when I enter at night (after 10 PM). But only in the rooms I’m actually in. I have three Bluetooth receivers (three Raspberry Pis) triangulating my position based on signal strength from multiple points.
It’s not GPS-accurate, but it’s room-level accurate. When I’m in the living room, the living room lights are on. When I move to the kitchen, kitchen lights activate and living room lights dim to 30%. It sounds fancy, but it’s just comparing RSSI values.
The “nobody home” automation that saves $40/month: When all family member phones are “away” for more than 10 minutes, the system:
- Turns off all lights
- Set the thermostat to eco mode
- Arms security system
- Turns off entertainment systems
My electric bill dropped from $180 to $140 after I implemented this. The thermostat change alone accounts for $30 of that.
Avoiding False Triggers
RSSI threshold sweet spot (-70 vs -80): I tested extensively. At -80, you get too many false positives from reflections and interference. At -60, it’s too strict and only triggers when you’re practically touching the receiver.
-70 dBm is the magic number for most scenarios. Adjust ±5 based on your environment. Metal buildings need -75. Open-plan spaces can go to -65.
Using the RBE node correctly: This node only passes messages when the value changes. Without it, you’d get hundreds of “home” messages per minute, flooding your system. With it, you get one “home” message when presence is detected, and one “away” message when lost.
Time delays that prevent chaos: Don’t trigger actions instantly. Add a 30-second delay on “away” triggers. People walk to their car, realize they forgot something, and come back. Without the delay, your house would constantly arm/disarm the security system.
I use the delay node set to rate limit—allow a maximum of one message per 30 seconds on the “away” path. On the “home” path, instant is fine because you want an immediate response when arriving.
Trick #2 – Control Any Bluetooth Speaker or LED Strip
This one’s trickier than presence detection because now you need to connect to devices and send commands. But once working, it’s powerful.
Why Generic BLE Control Is Harder Than It Should Be
Most Bluetooth devices use proprietary protocols. They’ll connect to their own app but not to generic tools. Govee LED strips, for example, have their own service UUIDs that aren’t documented anywhere official.
The pairing nightmare is real. Some devices want a PIN. Some want you to press a button while connecting. Some have a 30-second pairing window. And the error messages are useless: “Connection failed” tells you nothing about why it failed.
UUIDs nobody explains properly: Every Bluetooth device has services (like “LED Control” or “Battery Status”) identified by 128-bit UUIDs. Each service has characteristics (like “Color” or “Brightness”) with their own UUIDs. You need to know these to send commands.
My trial-and-error shortcut: use a phone app like nRF Connect to connect to the device and browse its services. Screenshot everything. Those UUIDs are what you’ll use in Node-RED.
Controlling Govee LED Strips Through Node-RED
I have three Govee H617C RGBIC LED strips. Getting them working with Node-RED took me six hours and a lot of forum diving. Here’s what I figured out.
The Setup Process (Actual Steps)
First, get the MAC address from the Govee app (Device Settings → Device Info → MAC Address).
In Node-RED:
- generic ble connect node pointing to that MAC
- Write to service 00010203-0405-0607-0809-0a0b0c0d1910
- Characteristic 00010203-0405-0607-0809-0a0b0c0d2b11
Yes, those look random. They’re Govee’s proprietary UUIDs.
To send a color command, you write a buffer: [0x33, RED, GREEN, BLUE, 0x00, 0xFF, 0xAE]
The function node code:
const red = msg.payload.red || 0;

const green = msg.payload.green || 0;

const blue = msg.payload.blue || 0;

msg.payload = Buffer.from([

    0x33,

    red,

    green,

    blue,

    0x00,

    0xFF,

    0xAE

]);

return msg;
This took forever to figure out. I found it buried in a GitHub issue thread where someone had reverse-engineered the protocol.
Creating a Color Dashboard
Install the node-red-dashboard package:
npm install node-red-dashboardAdd three slider UI nodes for red, green, and blue (range 0-255). Connect them to a join node that combines them into a single object, then to the function node above, then to the BLE write node.
Boom. You have a color picker dashboard. Access it at http://your-pi:1880/ui
I utilized the node-red-contrib-alexa-home-skill package to provide voice control through Alexa integration. Create a virtual gadget called “LED Strips,” and adjust the color based on Alexa requests. “Alexa, set LED strips to red” works flawlessly.
Bluetooth Speaker Automation
I keep an inexpensive Bluetooth speaker in my bathroom. Every morning at 6:30 AM, it auto-connects and plays a podcast at 40% volume. On weekends, it stays off until 9 AM.
The tricky part is volume control based on time. Most Bluetooth speakers use the standard Audio/Video Remote Control Profile (AVRCP), but the volume characteristic UUID varies.
For my speaker (a generic Chinese brand), the volume UUID is 0000ff02-0000-1000-8000-00805f9b34fb. I found this using nRF Connect.
Auto-connect when the phone is in range uses the same presence detection from Trick #1. When RSSI crosses -60, send a connect command to the speaker, wait 2 seconds, then send the play command.
Media player node configuration in Home Assistant (if you’re integrating): expose the speaker as a media player entity via MQTT. Node-RED publishes play/pause/volume commands to MQTT topics, Home Assistant listens and updates the UI.
Trick #3 – DIY Bluetooth Buttons for Under $5
Commercial smart buttons cost $25-35. For what? A button and a Bluetooth chip that costs $2 in components.
Why Commercial Buttons Cost $30 (And How to Skip That)
You’re paying for the app, the ecosystem, and the support. If you’re willing to do a little DIY, you can make buttons for pennies.
Puck.js alternative for cheap: I bought ESP32 dev boards for $4 each on AliExpress. They have built-in Bluetooth and can run on a coin cell battery for months. Flash them with custom firmware that broadcasts a button press count whenever the GPIO pin goes low (button pressed).
ESP32 as a button (weird but works): Connect a pushbutton between GPIO 0 and ground. Add a pull-up resistor. Flash this Arduino code:
#include <BLEDevice.h>

#include <BLEAdvertising.h>

int pressCount = 0;

BLEAdvertising *pAdvertising;

void setup() {

  pinMode(0, INPUT_PULLUP);

  BLEDevice::init("MyButton");

  pAdvertising = BLEDevice::getAdvertising();

}

void loop() {

  if (digitalRead(0) == LOW) {

    delay(50); // Debounce

    pressCount++;

    std::string data = std::string((char*)&pressCount, 4);

    pAdvertising->setManufacturerData(data);

    pAdvertising->start();

    delay(200);

  }

}
Total cost: $4 for ESP32, $0.10 for button, $0.50 for battery holder. $4.60 total.
The button I made from an old Bluetooth headset: I had broken Bluetooth earbuds (audio died, Bluetooth still worked). I soldered wires to the volume buttons, wrapped them in a 3D-printed case, and now I have a three-button remote. Free, since I was going to throw them away.
Detecting Button Presses in Node-RED
The Counter Method That Never Fails
Don’t try to detect the press event directly. Bluetooth advertising isn’t reliable enough—you’ll miss packets.
Instead, advertise a number that increments with each press. Node-RED watches for changes in that number. Even if it misses packets, eventually it sees the change and knows a press happened.
JavaScript code you can copy:
In the function node connected to your BLE scan:
// Extract press count from manufacturer data

const pressCount = msg.manufacturerData.readInt32LE(0);

// Store previous count in context

const prevCount = context.get('prevCount') || 0;

if (pressCount !== prevCount) {

    context.set('prevCount', pressCount);

    msg.payload = { event: 'button_press', count: pressCount };

    return msg;

}

return null; // No change, don't pass message
The advertising packet setup is the ESP32 code above. The key is using manufacturer data (0xFFFF company ID) to store arbitrary bytes.
What to Trigger
Scene activation: One button press = “movie mode” (lights dim, TV on, speakers connect). Two presses = “all off.” Hold for 3 seconds = “good night” (everything off, locks armed).
Door locks: I have a button by my bedroom door. One press locks all doors. Double-press unlocks the front door (for when someone’s standing outside).
Panic button setup (serious use): My mother-in-law lives with us. She has a button on her nightstand. If she presses it, it sends a notification to all family phones and turns on all her room lights. We tested this once—she pressed it by accident—and my wife and I both got alerts in 4 seconds. It works.
Advanced Multi-Button Setup
Single device, multiple button presses: Use different press patterns. One press = 1. Two presses within 1 second = 2. Three presses = 3. The function node tracks timing:
const now = Date.now();

const lastPress = context.get('lastPress') || 0;

const pressCount = context.get('tempCount') || 0;

if (now - lastPress < 1000) {

    // Within 1 second, increment

    context.set('tempCount', pressCount + 1);

} else {

    // More than 1 second, new sequence

    if (pressCount > 0) {

        msg.payload = { presses: pressCount };

       context.set('tempCount', 1);

        return msg;

    }

    context.set('tempCount', 1);

}

context.set('lastPress', now);

return null;
Long press detection: Check if the button state stays “pressed” for >2 seconds. My ESP32 sends different manufacturer data for long presses (0xFF instead of increment count).
Battery monitoring: The ESP32 can read its own battery voltage. I advertise it as a second byte in the manufacturer data. When the voltage drops below 2.8V, Node-RED sends me an email: “Button battery low.”
Trick #4 – Monitor Temperature Sensors Without Cloud Dependence
I have eight temperature/humidity sensors around my house. They used to send data to a cloud service. Then that service shut down, and my sensors became bricks. Never again.
Reading BLE Sensor Data Directly
Types of sensors that work: RuuviTag, Xiaomi Mijia, Govee thermometers, SensorPush, Inkbird—basically anything that broadcasts data. Most temperature sensors use advertising mode, so they don’t need to maintain a connection.
Advertising vs connection mode: Advertising is better for sensors. The sensor shouts its data constantly. Your hub listens—no pairing, no connection management, no authentication. The sensor doesn’t even know you’re listening. It saves battery and is far more reliable.
Why advertising is better: Connection mode means maintaining a link. If the connection fails (and it will), you’ll require reconnection logic, timeouts, and retry loops. Nothing can be dropped when it comes to advertising. The sensor broadcasts, and you listen. Done.
Building a Multi-Room Temperature Dashboard
I’m using RuuviTag sensors because they’re open-source hardware and have excellent documentation. They broadcast temperature, humidity, pressure, and battery level every second.
Parsing Advertising Packets
If you’re using the ble-sense node, it handles parsing automatically. You get clean JSON:
{

"temperature": 22.5,

  "humidity": 45.2,

  "pressure": 1013.25,

  "battery": 2950

}
If you’re using generic-ble and getting raw buffers, here’s the parsing code for RuuviTag format 5:
const data = msg.manufacturerData;

if (data[0] === 0x05) { // Format 5

    const temp = data.readInt16BE(1) * 0.005;

    const humidity = data.readUInt16BE(3) * 0.0025;

    const pressure = (data.readUInt16BE(5) + 50000) / 100;

    const battery = (data.readUInt16BE(13) >> 5) + 1600;

    msg.payload = {

        temperature: temp,

        humidity: humidity,

        pressure: pressure,

        battery: battery

    };

    return msg;

}
This took me hours to figure out. I finally found it in the RuuviTag documentation.
Storing Data Locally
I use InfluxDB for time-series storage. Install it on the Pi:
sudo apt install influxdb

sudo systemctl enable influxdb

sudo systemctl start influxdb
Install the InfluxDB node for Node-RED:
npm install node-red-contrib-influxdbConfiguration is straightforward. Point the InfluxDB node to localhost:8086, create a database called home_sensors, and write each sensor reading with tags for location:
msg.payload = {

    temperature: msg.temperature,

    humidity: msg.humidity,

    room: "bedroom",

    sensor: "ruuvi_01"

};
Graphing with Chart.js: I use the node-red-dashboard chart nodes. They can query InfluxDB directly and display line graphs. My dashboard shows the last 24 hours of temperature for all eight sensors on one screen.
Historical data that actually matters: I learned my HVAC was short-cycling by looking at six months of temperature data. The bedroom would spike 3 degrees, then drop 2 degrees, cycling every 20 minutes. That pattern was invisible day-to-day but obvious in the graphs. Fixed it by adjusting the thermostat differential and saved probably $30/month.
Alert System for Temperature Changes
Threshold triggers: A Simple function node that checks if the temperature is outside the acceptable range:
if (msg.temperature < 10 || msg.temperature > 30) {

    msg.payload = `Alert: ${msg.room} temperature is ${msg.temperature}°C`;

    return msg;

}

return null;
Pushover notifications setup: Install Pushover node:
npm install node-red-contrib-pushoverConfigure it with your Pushover API key. When the temperature alert triggers, send a high-priority notification. These come through even if your phone is on silent.
The frozen pipe alert that saved me: Last January, my basement’s temperature decreased to 3°C overnight. The Pushover notification startled me awake at 2 a.m. I went down and discovered that a window had blown open. If it had been open for another hour, my pipes would have frozen. A $6 sensor and ten minutes of setup saved me thousands on plumbing repairs.
Trick #5 – Car in Driveway = Garage Door Opens
This automation feels like magic. I pull into the driveway, and the garage door starts opening before I even reach for the button. Feels very “future.”
Bluetooth Car Detection Setup
How car Bluetooth differs from phones: Car Bluetooth is always discoverable when the car is on. It broadcasts constantly, looking for phones to pair with. This makes it perfect for detection.
My car’s Bluetooth name is “Honda-Audio-12345.” I found it by running a BLE scan while sitting in the running car. The MAC address is static—unlike iPhones, it doesn’t randomize.
Detection range optimization: Cars have terrible Bluetooth placement. The antenna is usually in the dashboard, which is inside a metal box. Range sucks. I get 20 feet maximum detection, and only when the car is approaching the garage.
I placed my Bluetooth receiver (Raspberry Pi with USB adapter) in the garage, as close to the driveway as possible. This gives me just enough range to detect the car about 15-20 feet before the garage door.
The timing problem (and solution): Garage doors take 12-15 seconds to open. I need to trigger the door before I arrive at it, not when I’m already there waiting.
The solution: trigger on first detection, not on close proximity. As soon as the car’s Bluetooth appears in scan results, start opening. By the time I drive up, it’s fully open.
Garage Door Integration
Safety First (Seriously)
Auto-opening garage doors can be dangerous. What if someone’s walking through? What if your kid is playing in the garage?
Why auto-open is dangerous: My neighbor had his garage door auto-open (using a different system), and it started opening while his wife was carrying boxes through. She got startled, dropped a box, and broke glassware. Not good.
The confirmation button approach: I added a physical button inside the garage. The automation only works if that button has been pressed within the last 10 minutes (indicating someone’s home and expecting it). This prevents random auto-opens when I’m not even home, but my car somehow triggers it.
Geofencing backup: I also check if my phone’s GPS location is within 0.5 miles of home. Only then does the car detection trigger anything: belt and suspenders.
The Complete Flow
- Detect car Bluetooth using generic-ble scan, filtered for the car’s MAC
- Delay and verify with a 3-second delay node to avoid false triggers from drive-bys
- Check safety conditions: button pressed recently? Phone geofence active? Time between 6 AM and 10 PM?
- Trigger relay connected to garage door opener (I used a Sonoff relay flashed with Tasmota)
- Status feedback via Pushover notification and LED light indicator in the house
The function node with all the logic:
const safetyButton = context.global.get('garageButtonPressed') || 0;

const phoneNearby = context.global.get('johnPresent') || false;

const hour = new Date().getHours();

if (safetyButton > Date.now() - 600000 && // 10 minutes

    phoneNearby &&

    hour >= 6 && hour <= 22) {

    msg.payload = "OPEN";

    return msg;

}

return null; // Don't trigger
Extending This to Other Auto-Triggers
Porch light activation: When the car is detected, turn on the porch light—a simple presence detection trick applied to a car instead of a person.
Security camera mode switching: My security cameras have two modes: “home” (don’t record inside) and “away” (record everything). Car detection helps determine which mode. Car present + phone present = home mode.
Indoor climate pre-conditioning: When the car is detected 5 minutes away (using phone geofence), turn on the HVAC to pre-cool/pre-heat the house. By the time I walk in, it’s comfortable. This one actually uses GPS, not Bluetooth, but it’s part of the same arrival automation.
Trick #6 – Low-Battery Alerts for All Your Bluetooth Devices
I have 23 battery-powered Bluetooth devices. Before I set this up, I’d randomly discover dead batteries when something stopped working. Now I get two weeks’ warning.
The Battery Monitoring Nobody Sets Up
Why this matters more than you think: Dead batteries are the #1 cause of “my smart home isn’t working” complaints in my house. Motion sensor stops detecting. The button doesn’t respond. The temperature reading freezes. All because of a dead battery I didn’t know about.
Devices that report battery vs those that don’t: Most modern BLE devices have a standard Battery Service (UUID 0x180F) with a Battery Level characteristic (0x2A19). But not all devices implement it.
RuuviTags: Yes, in advertising data
Xiaomi sensors: Yes, in advertising data
My DIY ESP32 buttons: Yes, I programmed it in Cheap Amazon sensors: Hit or miss, maybe 50% Older Bluetooth devices: Usually no Workarounds for non-reporting devices: If the device doesn’t report battery, but you know the typical lifespan (like 6 months on a CR2032), set a calendar reminder. Low-tech, but it works.
For devices that do report battery in advertising data but not as a standard service, you need to parse it manually. The RuuviTag parsing code I showed earlier includes battery extraction. Once you know where it is in the data packet, pulling it out is straightforward.
Creating a Battery Dashboard
I built a single screen that shows all 23 devices, their current battery levels, and how long since the last update. It’s become my daily check-in spot.
Pulling Battery Data
For devices with the standard Battery Service, use a generic-ble read node:
// Read battery level

msg.payload = {

    service: "180F",

    characteristic: "2A19"

};
The response is a single byte (0-100 representing a percentage).
For devices broadcasting battery in advertising packets (like RuuviTags), extract it from the manufacturer data as shown in Trick #4.
Polling vs notification method: Connection-based devices can notify you when the battery changes. This is more efficient than polling every hour. Configure the characteristic for notifications:
msg.payload = {

    service: "180F",

    characteristic: "2A19",

    notify: true

};
Now you only get updates when the value actually changes.
Update frequency optimization: Don’t poll batteries every minute. Once per hour is plenty. Batteries drain slowly. I use a cron inject node set to 0 * * * * (top of every hour) to trigger battery reads.
For advertising devices, grab battery data whenever you get the packet. Since they broadcast constantly anyway, there’s no extra overhead.
Alert System
Email at 20%: When any device drops below 20%, send an email with the device name and location. This gives me days or weeks to replace it before it dies.
Push notification at 10%: At 10%, send a high-priority Pushover notification. This is “change it today” territory.
The list view with battery icons: My dashboard uses node-red-dashboard template nodes with custom HTML:
The icon changes based on battery level: battery-full, battery-three-quarters, battery-half, battery-quarter, battery-empty.
The function node that generates this:
Const devices = context.global.get('allDevices') || [];

const formatted = devices.map(d => {

    let icon = 'full';

    if (d.battery < 75) icon = 'three-quarters';

    if (d.battery < 50) icon = 'half';

    if (d.battery < 25) icon = 'quarter';

    if (d.battery < 10) icon = 'empty';

    const lastSeen = new Date(d.timestamp);

    return {

        name: d.name,

        battery: d.battery,

        icon: icon,

        lastSeen: age < 60? `${age}m ago` : `${Math.floor(age/60)}h ago`

    };

});

msg.payload = formatted;

return msg;
This dashboard saved me an estimated 10 hours last year by preventing “why isn’t this working” debugging sessions that turned out to be dead batteries.
Trick #7 – Mesh Network of Bluetooth Sensors
Single-hub setups work for apartments or small houses. My 2,400 sq ft house with a detached garage needed more coverage. Enter the mesh network.
Going Beyond Single-Room Coverage
EspruinoHub as a bridge: EspruinoHub runs on a Raspberry Pi and bridges Bluetooth to MQTT. It’s specifically designed for this. Install it on multiple Pis scattered around your house, and they all publish to the same MQTT broker.
Installation on each Pi:
git clone https://github.com/espruino/EspruinoHub

cd EspruinoHub

npm install
Edit config.json to point to your central MQTT broker (which can be on any of the Pis or a separate server).
Multiple Raspberry Pis as receivers: I have three Pis:
- Living room (main Node-RED instance)
- Garage (just EspruinoHub)
- Upstairs bedroom (just EspruinoHub)
They all scan for Bluetooth devices and publish everything to MQTT. My main Node-RED instance subscribes to all the topics and processes them.
MQTT broker configuration: I use Mosquitto on the main Pi:
sudo apt install mosquitto mosquitto-clients

sudo systemctl enable mosquitto

Basic config (/etc/mosquitto/mosquitto.conf):

listener 1883

allow_anonymous true
(Yes, I know Anonymous isn’t secure. This is on an isolated VLAN with no internet access. For production, use authentication.)
Building a Whole-Home Presence Map
This is where it gets cool. With three receivers, I can determine which room someone is in based on signal strength triangulation.
Triangulation with Multiple Receivers
Each Pi reports RSSI for my phone. Living room says -65. Garage says -80. Upstairs says -55. The strongest signal (upstairs, -55) is closest to my actual location.
Signal strength from 3+ points: More receivers equal increased accuracy. With two points, you can say “closer to A or B.” With three, you can approximate the position. Four or more detectors enable accurate room-level detection.
Calculating position (simplified): I’m not using genuine trilateration (it’s very complex and requires calibration). Instead, simple logic:
const signals = [

    { location: 'living_room', rssi: msg.living_room },

    { location: 'garage', rssi: msg.garage },

    { location: 'upstairs', rssi: msg.upstairs }

];

// Sort by strongest signal

.sort((a, b) => b.rssi - a.rssi);

// You're in the room with the strongest signal

msg.payload = signals[0].location;

return msg;
Room-level accuracy vs exact position: This won’t tell you “3.2 meters from the north wall.” But it reliably tells you which room you’re in. That’s good enough for lighting automation.
I tested this for two weeks. The accuracy was about 85% correct room identification. The 15% errors were mostly in doorways between rooms, which makes sense.
Practical Applications
Room-based lighting: As I move through the house, lights turn on in the room I enter and turn off in the room I leave. This works shockingly well. My wife was skeptical until she experienced it—now she complains when we visit other people’s houses and have to control the lights manually.
Following music from room to room: I have Bluetooth speakers in four rooms. When I move rooms, the music seamlessly transfers to the new room’s speaker. The technical term is “audio follow mode,” and it’s a feature on high-end systems that costs thousands. I built it with $60 in hardware.
The Node-RED flow detects a room change, pauses the current speaker, connects to the new room’s speaker, and resumes playback. There’s a 2-3 second gap during the switch, but it works.
Elder care monitoring: My mother-in-law wears a Bluetooth pendant (technically a fitness tracker, but I don’t care about the fitness features). I can see which room she’s in, how long she’s been there, and get alerts if she doesn’t leave her bedroom by 10 AM (health check).
This isn’t creepy surveillance. She knows about it, asked for it, and appreciates the safety. When she fell in the bathroom last year, we knew within 30 seconds because the system detected no movement—probably saved her from lying there for hours.
The MQTT Setup Everyone Needs
Broker installation is covered above (Mosquitto). For Node-RED, install the MQTT nodes (they’re built-in, but make sure they’re enabled).
Topic structure that scales: Don’t do flat topics like /sensor1, /sensor2. Use hierarchy:
home/bluetooth/living_room/scanner/status

home/bluetooth/living_room/device/AA:BB:CC:DD:EE: FF/rssi

home/bluetooth/living_room/device/AA:BB:CC:DD:EE: FF/battery

home/bluetooth/garage/scanner/status

home/bluetooth/garage/device/AA:BB:CC:DD:EE: FF/rssi
This lets you subscribe to patterns like home/bluetooth/+/device/AA:BB:CC:DD:EE: FF/rssi to get signal strength from all locations for one device.
Debugging MQTT flows: Use an MQTT in node subscribed to # (wildcard for everything). Connect it to a debug node. You’ll see every message. This is invaluable when figuring out why something isn’t working.
The MQTT broker on my system handles about 1,500 messages per minute. Mosquitto barely notices. It’s running on a Raspberry Pi 3 alongside Node-RED and uses 5% CPU.
Troubleshooting the Stuff That Will Definitely Go Wrong
After two years and 15 different setups, I’ve encountered every possible Bluetooth problem. Here’s what actually happens and how to fix it.
Bluetooth Adapter Won’t Show Up
Permission issues (Bluetoothd fix): The most common problem. Symptoms: hcitool dev shows nothing, or “permission denied” errors.
Fix:
sudo systemctl status bluetooth

If it's not running, start it:

sudo systemctl start bluetooth

sudo systemctl enable bluetooth
If it’s running but still doesn’t work:
sudo usermod -a -G bluetooth $USER

sudo setcap 'cap_net_raw,cap_net_admin+eip' $(which node)
Reboot after this. Linux Bluetooth permissions are weird.
Hardware incompatibility checklist:
- Is the adapter plugged directly into the Pi or through a hub? (Direct only)
- Is it in a USB 3.0 port? (Use USB 2.0 instead)
- Does lsusb show the device? (If not, hardware failure)
- Try a different USB port
- Try a different adapter (some are just garbage)
USB power problems: Bluetooth adapters are power-hungry. If you’re powering your Pi with a weak power supply (less than 2.5A), the USB ports might not deliver enough power. Symptoms: The adapter works for a while, then stops. Upgrade to a 3A power supply.
I learned this the hard way when my garage Pi kept losing Bluetooth every few hours. Swapped the power supply, the problem disappeared.
Devices Keep Disconnecting
Signal interference sources: Bluetooth uses the 2.4GHz frequency range. WiFi, microwave ovens, baby monitors, and wireless landline phones are also compatible. I had a device that would disconnect when I used the microwave. I had a device that would disconnect whenever I used the microwave. Moved it 10 feet away, problem solved.
Other interference sources:
- USB 3.0 devices (huge problem, documented by Intel)
- WiFi routers broadcasting on 2.4 GHz channels 6-11
- Cheap LED bulbs (seriously, they emit RF noise)
- Aquarium pumps and timers (weird but true)
The USB 3.0 problem: This deserves its own section. USB 3.0 generates electromagnetic interference in the 2.4 GHz band. If your Bluetooth adapter is near a USB 3.0 device (like an external hard drive), it will have constant disconnections.
Solution: Use USB 2.0 ports exclusively for Bluetooth. On a Raspberry Pi 4, the two black USB ports are USB 2.0. Use those.
Antenna placement tricks: Most USB Bluetooth adapters have internal antennas. Positioning matters. I found that:
- Vertical orientation is better than horizontal
- Away from metal surfaces (metal reflects RF)
- At least 6 inches from the Pi itself (the Pi generates noise)
I use a 6-inch USB extension cable to get the adapter away from the Pi. Reliability went up noticeably.
Node-RED Can’t Find Devices
Scanning vs advertising modes: Some nodes only scan for connectable devices. If your sensor is advertising-only (like RuuviTag), you need a node that listens to advertising packets, not just scans for connectable devices.
Use generic-ble in scan mode with “advertisement” option enabled, or use ble-sense, which is designed for advertising.
The hcitool verification command: Before blaming Node-RED, verify Bluetooth is working at the system level:
sudo hcitool lescanYou should see devices appearing. If not, the problem is your Bluetooth setup, not Node-RED.
If hcitool sees devices but Node-RED doesn’t, it’s a permission issue. Make sure Node-RED has the capabilities set (see above).
When to restart everything: Sometimes Bluetooth gets stuck. The bluetoothd daemon gets confused. Full restart procedure:
sudo systemctl restart bluetooth

sudo hciconfig hci0 down

sudo hciconfig hci0 up

node-red-restart
This fixes 90% of “it was working, now it’s not” problems.
Performance Issues with Multiple Devices
Connection limits (the real numbers): Bluetooth has a theoretical limit of 7 simultaneous connections. In practice, I get reliable performance with 4-5 connections. Beyond that, things get flaky.
If you need more, use advertising mode for sensors (no connection required) and only maintain connections to devices you’re actively controlling.
Polling frequency optimization: Don’t poll devices every second. Most smart home data doesn’t change that fast. Temperature? Every 5 minutes is fine. Battery level? Once per hour.
I had a setup that polled 8 sensors every 10 seconds. CPU usage was 40% just handling Bluetooth. Changed to every 60 seconds. CPU dropped to 8%. Data quality unchanged.
When to use multiple adapters: If you have 10+ devices and need active connections to all of them, use two Bluetooth adapters. Assign devices to specific adapters in your Node-RED flows.
I haven’t needed to do this because most of my devices use advertising mode. But I tested it—it works fine, requires manual assignment of devices to adapters.
Security Stuff You Can’t Ignore
I ignored security for the first six months—big mistake. Someone parked outside my house and connected to one of my Bluetooth speakers because I hadn’t set up pairing properly.
Is Bluetooth Secure Enough for Smart Home?
Honest assessment (not marketing fluff): Bluetooth LE with proper pairing and encryption is reasonably secure. The encryption (AES-128) is strong. The pairing process, when done right, prevents unauthorized access.
But.
Many cheap smart home devices implement Bluetooth poorly. They skip encryption, use default PINs, or have pairing modes that never time out. That’s where problems arise.
Attack vectors that actually matter:
- Eavesdropping: If data isn’t encrypted (many advertising packets aren’t), someone nearby can read it. For temperature sensors, who cares? For door lock commands, huge problem.
- Spoofing: An attacker could pretend to be your phone and trigger automations. Requires knowing your phone’s MAC address (easy to sniff).
- Replay attacks: Record and replay a “unlock door” command. Only works if the system doesn’t use challenge-response authentication.
When to use WiFi instead: Anything security-critical (door locks, garage doors, cameras) should use WiFi with proper encryption and authentication. Or use Bluetooth with mandatory pairing and encryption.
I use Bluetooth for low-stakes stuff: lights, sensors, music. High-stakes stuff uses WiFi or hardwired Z-Wave.
Basic Bluetooth Security in Node-RED
MAC Address Filtering
Don’t accept connections from random devices. Whitelist known MAC addresses:
const allowed = [

    'AA:BB:CC:DD:EE:FF', // John's phone

    '11:22:33:44:55:66', // Jane's phone

    'A1:B2:C3:D4:E5:F6' // Car

];

if (allowed.includes(msg.address)) {

    return msg;

}

return null; // Block everything else
Simple but effective. Prevents random people from triggering your automations.
Blocklist for problem devices: I had a neighbor’s Bluetooth speaker that kept appearing in my scans, triggering false presence detections. Added its MAC to a blocklist:
const blocked = ['XX:XX:XX:XX:XX: XX'];

if (blocked.includes(msg.address)) {

    return null;

}

return msg;
Encryption and Pairing
When pairing is required: Any device that accepts commands (speakers, locks, LED strips) should require pairing. This establishes an encrypted connection with authentication.
In Node-RED, most nodes handle pairing automatically. But make sure you’ve set a pairing PIN on the device if it supports one.
PIN code management: Don’t use default PINs like “0000” or “1234.” Change them. I use a password manager to store device PINs—yes, for my Bluetooth devices. Overkill? Maybe. But better than getting hacked.
Re-pairing procedures: If you suspect a device has been compromised, unpair it, reset it, and re-pair with a new PIN. I do this annually for all devices just as a precaution.
Network Isolation Best Practices
VLAN setup for IoT: My smart home devices are on a separate VLAN (192.168.2.x) with no internet access except through a whitelist. My main network (192.168.1.x) can access IoT devices, but not vice versa.
This is router-level configuration, not Node-RED specific. But it’s critical. If a smart device gets hacked, the attacker can’t reach my computers or phones.
Firewall rules: Block all outbound traffic from the IoT VLAN except to specific IPs (like the MQTT broker). This prevents compromised devices from phoning home or participating in botnets.
My pfSense firewall rules:
- Allow IoT VLAN → MQTT broker (port 1883)
- Allow IoT VLAN → Home Assistant (port 8123)
- Block everything else
The paranoid approach (worth it?): Some people run Bluetooth on a completely air-gapped network with no internet at all: no remote access, no cloud integration, nothing.
Is it worth it? Depends on your threat model. For me, VLAN isolation is enough. For someone who’s actually being targeted, air-gapping might make sense.
Real Talk: What Bluetooth Can’t Do Well
Let’s be honest. Bluetooth isn’t perfect. Here’s where it falls short.
Speed Limitations
File transfer (forget it): Bluetooth LE maxes out around 1 Mbps (125 KB/s) in practice. That’s usable for sensor data and simple commands. It’s not usable for anything substantial.
I tried using Bluetooth to stream camera feeds to my dashboard. Laughably bad. 2-3 second delays, constant buffering. WiFi handles this easily.
Video streaming (nope): Related to above. Bluetooth doesn’t have the bandwidth for video. Even low-resolution video. Don’t try.
What bandwidth you actually get: Theoretical maximum is 2 Mbps for Bluetooth 4.0 and 2 Mbps for BLE. In practice, with overhead, you get 0.8-1.2 Mbps. WiFi gives you 50-150 Mbps easily.
Use Bluetooth for:
- Sensor readings (bytes of data)
- Simple commands (turn on, change color)
- Status updates
- Button presses
Don’t use Bluetooth for:
- Audio streaming (use WiFi or Bluetooth Classic, not BLE)
- Video anything
- Large data transfers
- Real-time applications requiring <100ms latency
Range Reality Check
The spec says 100 meters. That’s line-of-sight in an open field with ideal conditions and no interference.
My whole-house test results:
- Same room, line of sight: 60-70 feet, perfect
- One interior wall: 35-40 feet, reliable
- Two interior walls: 20-25 feet, occasional drops
- Concrete/brick wall: 10-15 feet maximum
- Metal door/wall: 5-10 feet or doesn’t work at all
- Between floors: 15-20 feet if you’re directly below/above
Obstacles that kill the signal:
- Metal (worst offender—Faraday cage effect)
- Water/aquariums (absorbs 2.4 GHz like crazy)
- Concrete with rebar (metal + concrete combo)
- Multiple walls at angles (each wall reduces the signal by 30-50%)
When you need WiFi instead: Anything further than 40 feet, use WiFi. Anything that needs to work through metal barriers, use WiFi. Outdoor devices use WiFi or LoRa.
Bluetooth is for room-scale or home-scale with multiple hubs. It’s not for property-wide coverage.
Device Compatibility Issues
Proprietary protocols: Many manufacturers use Bluetooth but implement their own proprietary protocols on top. Govee, for example, uses standard BLE but with custom UUIDs and command formats that aren’t documented.
Reverse-engineering these takes time. Sometimes you get lucky and find someone else has already figured it out (GitHub is your friend). Sometimes you’re stuck using the manufacturer’s app.
Devices that refuse Node-RED: Some devices implement pairing in ways that only work with their app. They use app-specific certificates or challenge-response authentication that can’t be replicated in Node-RED.
I bought a “smart” Bluetooth lock that was completely locked down (pun intended). It could only be controlled through the manufacturer’s app and returned.
The workaround ecosystem: Sometimes you can’t directly control a device from Node-RED, but you can control it indirectly. For example:
- Control device from the manufacturer’s app
- The manufacturer app connects to the cloud
- Node-RED uses the manufacturer’s cloud API
- Cloud sends a command to the device
It works, but adds latency and internet dependency. Not ideal, but sometimes it’s the only option.
Taking It Further (Next-Level Ideas)
Once you have the basics working, here are some advanced integrations worth exploring.
Integration with Home Assistant
Home Assistant is a popular open-source home automation platform. It plays beautifully with Node-RED via MQTT.
MQTT bridge setup: Node-RED publishes sensor data and device states to MQTT topics. Home Assistant subscribes to these topics and creates entities automatically.
In Home Assistant’s configuration.yaml:
mqtt:

  Sensor:

    - name: "Living Room Temperature"

      state_topic: "home/bluetooth/living_room/temperature"

      unit_of_measurement: "°C"

    - name: "Garage Presence"

      state_topic: "home/bluetooth/garage/presence"
Entity creation: Each MQTT topic becomes an entity in Home Assistant. These show up in dashboards, can trigger automations, and integrate with voice assistants.
Dashboard cards: Home Assistant’s Lovelace UI is fantastic for visualizing data. I have a card showing all my Bluetooth sensors, their battery levels, and last update times. All pulling from MQTT topics published by Node-RED.
Voice Control via Alexa or Google Home
Direct Bluetooth-to-Alexa integration doesn’t exist. But there’s a workaround.
The indirect method:
- Node-RED detects Bluetooth events
- Updates a virtual switch in Home Assistant
- Home Assistant exposes that switch to Alexa
- Alexa can now trigger it
Or, use the node-red-contrib-alexa-home-skill package to create virtual devices directly in Node-RED. These show up in the Alexa app as smart home devices.
Virtual switches: Create a switch entity for each automation. “Alexa, turn on movie mode” triggers the movie-mode automation, which sends Bluetooth commands to dim lights, turn on speakers, etc.
Natural language commands: With Home Assistant’s Assist or Alexa routines, you can map natural phrases to automations. “Alexa, I’m going to bed” triggers the good-night routine, which locks Bluetooth door locks, arms security, and turns off speakers.
Combining Bluetooth + WiFi Automation
Best of both worlds: Use Bluetooth for local, low-latency control. Use WiFi for cloud integration and remote access.
Example: Bluetooth presence detection triggers lights instantly (no latency). But it also updates a Home Assistant entity via WiFi/MQTT, which syncs to the cloud, enabling remote monitoring.
Fallback systems: If WiFi dies, Bluetooth automations still work because they’re local. If Bluetooth fails, WiFi devices can still be controlled manually through apps.
Redundancy that works: I have critical automations (like “is someone home?”) using both Bluetooth presence and WiFi-based phone tracking. If either reports “home,” the house knows someone’s there. This handles edge cases where one method fails.
Conclusion: Start With One Trick, Then Add More
After reading 3,800 words about Bluetooth automation, you might feel overwhelmed. Don’t be. Start small.
My Recommendation for Beginners
Pick Trick #1 (presence detection) first. It’s the easiest, requires minimal hardware (just a Bluetooth adapter), and the payoff is immediate. Spend a weekend getting it working. Once you’ve got your phone being detected reliably, you’ll understand the core concepts.
Then add Trick #6 (battery monitoring) if you have sensors, or Trick #3 (DIY buttons) if you want something more interactive. These build on the same scanning skills from Trick #1.
Save the mesh network and triangulation for later. Those are advanced topics that require multiple devices and careful calibration.
Timeline to full setup (realistic):
- Week 1: Presence detection working
- Week 2-3: Add 2-3 more sensors or buttons
- Month 2: Battery monitoring and dashboards
- Month 3-4: Multi-room coverage and automation refinement
Don’t rush. I spent two years building this system iteratively. Each automation taught me something new.
Common mistakes to avoid:
- Buying 20 devices before testing one (I did this—don’t)
- Ignoring range limitations (measure your actual space)
- Skipping security (at least implement MAC filtering)
- Not documenting your flows (six months later, you’ll forget how it works)
- Over-complicating early automations (start simple)
Resources Worth Bookmarking
Node-RED community forum: discourse.nodered.org – Incredibly helpful community. I’ve had responses to questions within hours.
GitHub repos I actually use:
- EspruinoHub for Bluetooth-to-MQTT bridging
- node-red-contrib-generic-ble for the BLE nodes I rely on
- RuuviTag documentation for sensor data parsing
Discord servers for help:
- Home Assistant Discord (they have a Node-RED channel)
- Node-RED Slack (official, but less active than I’d like)
Final Thoughts
Two years ago, I would’ve told you Bluetooth had no place in serious home automation. WiFi or Z-Wave for everything, period.
I was wrong.
Bluetooth fills a specific niche perfectly: low-power, local control, no cloud dependency, battery-friendly sensors. It’s not a replacement for WiFi—it’s a complement.
Personal wins from 2 years of Bluetooth automation:
- Cut my “devices offline” issues by 80%
- Reduced network bandwidth usage by 40%
- Saved ~$100/year in batteries
- Added presence detection that’s faster and more reliable than any WiFi/GPS solution
The surprise benefits nobody mentions:
- It still works when the internet is down (happened twice, I was the only neighbor with working automations)
- Privacy—no cloud servers means no data leaving your house
- Latency—Bluetooth reactions are near-instant, no cloud round-trip
- Learning—forced me to understand protocols and networking deeper than clicking through apps
What I’d do differently if starting over:
- Buy ASUS Bluetooth adapters from day one (would’ve saved me hours)
- Set up the MQTT architecture properly from the start (my first attempt was a mess)
- Document everything in a wiki (I forgot how half my flows work)
- Start with the monitoring dashboard (would’ve caught issues faster)
If you implement even two of these tricks, your smart home will be more reliable, more responsive, and honestly, more fun to use.
Ready to ditch those WiFi headaches and build a smarter, more responsive home? The hardware is sitting in a drawer (or in your cart waiting for checkout). The software is free. The only thing stopping you is clicking “Deploy” on that first flow.
Start with presence detection today. By next weekend, your lights will welcome you home before you reach for the door handle. And that’s just the beginning.
Have questions about your specific setup? Drop them in the comments below—I check daily and love helping people troubleshoot their Bluetooth adventures.
Frequently Asked Questions
Q: How far does Node-RED Bluetooth work compared to WiFi in a typical home?
In my 2,400 sq ft house, a single Bluetooth adapter covers about 40-50 feet through standard drywall. That’s enough for 3-4 rooms if centrally placed. WiFi typically covers 2-3x times that distance, but Bluetooth uses way less power and doesn’t congest your network. For most homes, 2-3 Bluetooth hubs provide complete coverage.
Q: Can I control Bluetooth devices with Node-RED when I’m away from home?
Not directly—Bluetooth requires physical proximity. But you can control them indirectly: Node-RED + MQTT + Home Assistant creates a bridge. Your phone connects to Home Assistant via the internet, Home Assistant sends commands via MQTT, Node-RED receives them and controls local Bluetooth devices. I’ve been doing this for 18 months with zero issues.
Q: What’s the best Node-RED Bluetooth node for beginners just getting started?
Start with node-red-contrib-ble-sense if you’re using RuuviTag or Xiaomi sensors—it’s plug-and-play simple. For everything else, use node-red-contrib-generic-ble. Avoid node-red-contrib-noble unless you’re on Windows/Mac; it has Node.js compatibility issues that’ll frustrate you for hours.
Q: How do I fix Node-RED Bluetooth devices that keep disconnecting randomly?
90% of disconnection problems are either USB 3.0 interference or power issues. Move your Bluetooth adapter to a USB 2.0 port (the black ports on Raspberry Pi 4), use a 3A power supply minimum, and keep the adapter away from other USB 3.0 devices. If that doesn’t fix it, check for microwave ovens or baby monitors nearby—they operate on the same 2.4 GHz frequency.
Q: Is Bluetooth Low Energy secure enough for smart home door locks?
BLE with proper pairing and AES-128 encryption is reasonably secure, but many cheap smart home devices skip encryption entirely. For door locks specifically, I recommend WiFi with strong authentication or hardwired Z-Wave over Bluetooth. If you must use Bluetooth locks, ensure they require pairing, change default PINs, and implement MAC address allowlisting in your Node-RED flows.
Q: Can Node-RED detect multiple Bluetooth devices simultaneously or just one?
Node-RED can monitor dozens of Bluetooth devices simultaneously through advertising packets (no connection required). For active connections where you’re sending commands, the practical limit is about 4-5 simultaneous connections before reliability suffers. I monitor 23 sensors and control 8 devices from a single Raspberry Pi without issues.
Q: How much does it cost to build a complete Node-RED Bluetooth smart home setup?
My complete setup cost roughly $85: Raspberry Pi 4 ($35), ASUS USB Bluetooth adapter ($12), power supply ($8), SD card ($10), plus about $20 in misc cables and cases. Add sensors/devices as needed—RuuviTag sensors run $30-40 each, but cheap Xiaomi sensors work fine at $6-8. You can start with just the Pi and adapter for $50 total.
Q: Do I need programming experience to set up Bluetooth automation in Node-RED?
No formal programming required, but basic logic understanding helps. Node-RED is a visual drag-and-drop for most functions. The trickiest parts (like parsing sensor data) require JavaScript snippets, but you can copy-paste code from forums. I started with zero JavaScript knowledge—learned what I needed through trial and error over a few weekends.rth wall.” But it reliably tells you which room you’re in. That’s good enough for lighting automation.
I tested this for two weeks. The accuracy was about 85% correct room identification. The 15% errors were mostly in doorways between rooms, which makes sense.
eap Xiaomi sensors work fine at $6-8. You can start with just the Pi and adapter for $50 total.
Q: Do I need programming experience to set up Bluetooth automation in Node-RED?
No formal programming required, but basic logic understanding helps. Node-RED is visual drag-and-drop for most functions. The trickiest parts (like parsing sensor data) require JavaScript snippets, but you can copy-paste code from forums. I started with zero JavaScript knowledge—learned what I needed through trial and error over a few weekends.